Monday, November 19, 2012

The Simple Back Stitch

I once thought that anything done with needle and thread had to consist entirely of running stitches. That was the way I originally learned how to sew, of course, and could not fathom the depth of variety that the needle and thread pair could create in one piece of fabric. As I started to look closely at samplers and magazine tutorials (this is in my younger years... before the internet was a big deal), the first departure from the running stitch I noticed was the cross-stitch. Still to this day, I hold something against it and I'm not sure why. My mother-in-law has done some beautiful cross stitch work and makes me reconsider my aversion to it. At the end of the day, I think it comes from the rigidity of the pattern--very geometrical, with not as many opportunities for curves or swooshes or the delicate rise and fall of lines that are found in nature. 

I take no issue with geometry in quilting, but with needle and thread, for some reason it's different. This is part of the reason why, when I discovered the back stitch, I suddenly felt the doors of expression in the world of embroidery open with a big whoosh of ideas. There we go, I thought. Here are curves; the stems for flowers; the roll of hills.

Are you ready to take a break from geometry? Give your text some curves. Here's where we left off after we transferred our pattern:


Put it in a hoop! These are super cheap.
I got all my colors picked out for this project and I'm going with a pretty subdued pallet. It's the onset of winter that does this to me.


Thread your needle, knot the end, and stick it through where ever you want to start.

Make a simple stitch to start.

My nails are purple, not black (that's for you mom!)

Wander down the line a bit and pull your thread through. You want to give a stitch's worth of space, as if you were starting a running stitch.

And here's where the "back" in "back stitch" comes in: Instead of moving forward with your running stitch, back it up to the exact same hole where your previous stitch ended up.

Hey look at that! Two stitches! Right together, in a beautiful, wonderful, continuous line.

Keep on going and you'll eventually outline all your letters. I started going backwards and filling in the letters. I think it makes it look more cozy. The onset of winter and all.

Right next to your first line of stitches, start again, making sure that you start in the middle of a stitch on the original line. This will make the stitches appear staggered. They will be neat and tidy, but with variety!


After your first stitch, head backwards again. You're on your way!

I will be packing this in my "fun" bag for my upcoming 12 hour car ride. I can't wait to get the minty color on the leaves!
I hope these photos help expand your stitching literacy. I always look forward to the times when I can just sit, hoop and needle in hand, and see a project come together. 

Also, let me just impress you with the knowledge that I took all these pictures myself, doing some crazy DSLR yoga moves to feature my right hand holding a needle, and hitting the button/holding the camera with my left/keeping the cat out of the shot. I give myself a pat on the back.

Sunday, November 18, 2012

Pattern Transfer Tips

There are several different ways to transfer an embroidery pattern to your fabric. If you're interested in embroidery, think about experimenting with these to see which one is the most convenient for you. 

First thing is first, find a pattern you enjoy, and if it is online, print it!
  1. Light
    • Place the pattern underneath your chosen fabric, and on top of a light box. Trace the pattern directly onto the fabric with a water soluble fabric marker.
    • If you do not have access to a light box, tape the pattern, with your fabric on top, onto a window with good light.

      I personally don't own a light box, though you can find them at most craft stores for relatively cheap. I have these big sliding doors to my little apartment balcony that have come in handy.
Grab your pattern, some tape (painter's tape leaves no residue!) and a water-soluble fabric marker. Oh, and your fabric.

Tape your pattern onto your window.

Tape your fabric over your pattern. Your image should be clearly visible through the fabric.

You're ready to start tracing.

Trace away!

... until you have finished the whole thing! Remove fabric, pattern, and all tape and get stitching!
  1. Paper
    • Trace the pattern from the pattern sheet to a sheet of parchment paper, using any writing utensil. Pin the parchment paper, which now contains the pattern, directly onto your fabric.
    • Stitch through fabric and parchment paper along pattern lines. When the embroidery is finished, removed parchment paper carefully.
    • You may have to use your embroidery needle to grab little bits of paper from underneath stitches.

The in-between option for "paper" and "heat" is, of course, wax paper. I have ironed wax paper onto fabric before that contains my traced pattern, and stitched through. The heat will help the wax paper stick onto the fabric temporarily, but will not be a lasting solution. It will be good for a project that can be completed in just a few hours, but not for something you will need to put down and come back to.

  1. Heat
    • Print the pattern onto a sheet of heat transfer paper. This can be purchased online or at any craft store in your area (also: Walmart.) Heat transfer paper will usually be found in aisles containing t-shirt crafts. My packet of 6 sheets cost around 8 dollars.
    • Be sure to follow the instructions that come with the heat transfer paper. You will have to mirror the image in adobe before you print, so that it will appear backwards to you.
    • Iron the pattern onto your fabric. Remove the paper and get stitching!
Don't know how to mirror images in adobe? Here's a quick run through:
Open your pattern in Adobe


Head up to "File" and select "Print"

In the print setup, select "Properties"

In "Properties" select "Mirror Image" from "More Options" 
And here's the difference! On the left is your original image; on the right is your new mirrored pattern!

Once you figure out how everything works you can print your new backwards pattern onto the heat transfer paper.

Make sure you print on the right side and follow the instructions on the paper.

Prepare your fabric and get your iron warmed up!

Flip it over and get ironing. Once it's sufficiently ironed (per your heat transfer instructions) you will need to give it some cool off time before you peel the paper off.

Peel slowly, but with purpose.

Congratulations! Your pattern has been successfully transferred. You're ready to start stitching!

For the fastest and most convenient method, I would go with the heat transfer paper. For the cheapest, I'd stick with my little window. The paper method (with parchment paper) can get a little tricky with longer projects, and I usually have to put my embroidery down before I'm finished, so I hardly ever use this method.

I hope this gets you going on your embroidery adventures! "But Mrs. Kopf," you say, "I don't know how to do any of those fancy stitches..." "Check back here tomorrow," I say to you. "I've got you covered."

If you have any additional questions, you can email me at kopfdropcrafts (at) gmail.com. 

Saturday, November 17, 2012

Embroidery Patterns

As I mentioned in my last post, I have been working on some embroidery patterns for my Etsy store. These are doodles that I have been making and embroidering for myself for a long time, and now that I have a scanner and some free time, I can finally share them with the world!


"And now these three remain: faith, hope, and love. But the greatest of these is love." 1 Corinthians 13:13

You can grab each of these as individual patterns, or in a bundle. Consequently, there's a lot of little girls out there named Faith and Hope, and plenty of people who just plain love Love. The individual are all the same size, but in the bundle, they increase in size, with faith the smallest and love the greatest!


I've got most things set at iTunes prices. They come in PDF form and will be emailed to you 12 hours after your purchase. If you're new to embroidery, I encourage you to jump into this adventure! Throughout the week, I'll be posting tutorials on the two types of simple stitches these easy patterns require, how to fill in your embroidery, and how to transfer your patterns onto your fabric.

Embroidery patterns are my go-to road trip project, so if you're travelling (by car) this Thanksgiving, consider packing this easy craft in your snack bag. I've also given away embroidered messages as Christmas gifts, framed and ready for hanging. They're great projects for when you want something small and simple to be able to put down and pick back up again. Embroidery is also a pretty cheap addiction hobby. Embroidery floss is cheap, fabric can be cheap, and the needles come in packs of ten so if you lose one, it won't be the end of the world. (This all, of course, depends on where you lose it...)


The next pattern I'll have in the shop will be the welcome wreath. Just a few more little tweaks and then it will be ready to go! 


"Small cheer and great welcome make a merry feast." Shakespeare


Check back regularly for instructions on stitches and transfers. Even on Thanksgiving Break, I can't help teaching. :)


Thursday, November 15, 2012

Updates!

I have returned to the blogging world of the interweb with news and updates for all!

It's been a bit of a long break (11 days--really?) and I took it (albeit a little grudgingly) to focus on school. Teaching is more than a full time job, and this is the time of year when there's many grades to be entered, emails to be sent, and assessments to make. I've had my hands full with student presentations, starting new units, and wrapping up old ones. It's an incredibly fulfilling job and I've been happy to see so many "light bulb moments" just in the last week! I have a simply amazing group of students and I am constantly aware of the unique position I am in--from my post at the front of the classroom, I see kids growing up daily, asking great questions, and sure, occasionally falling asleep--but I know how lucky I am to be there. 

When I'm not grading papers, I sit at home, quietly crafting, and finding solace in my fortress of solitude. Here's a peek at what I've been working on, and what's coming up.


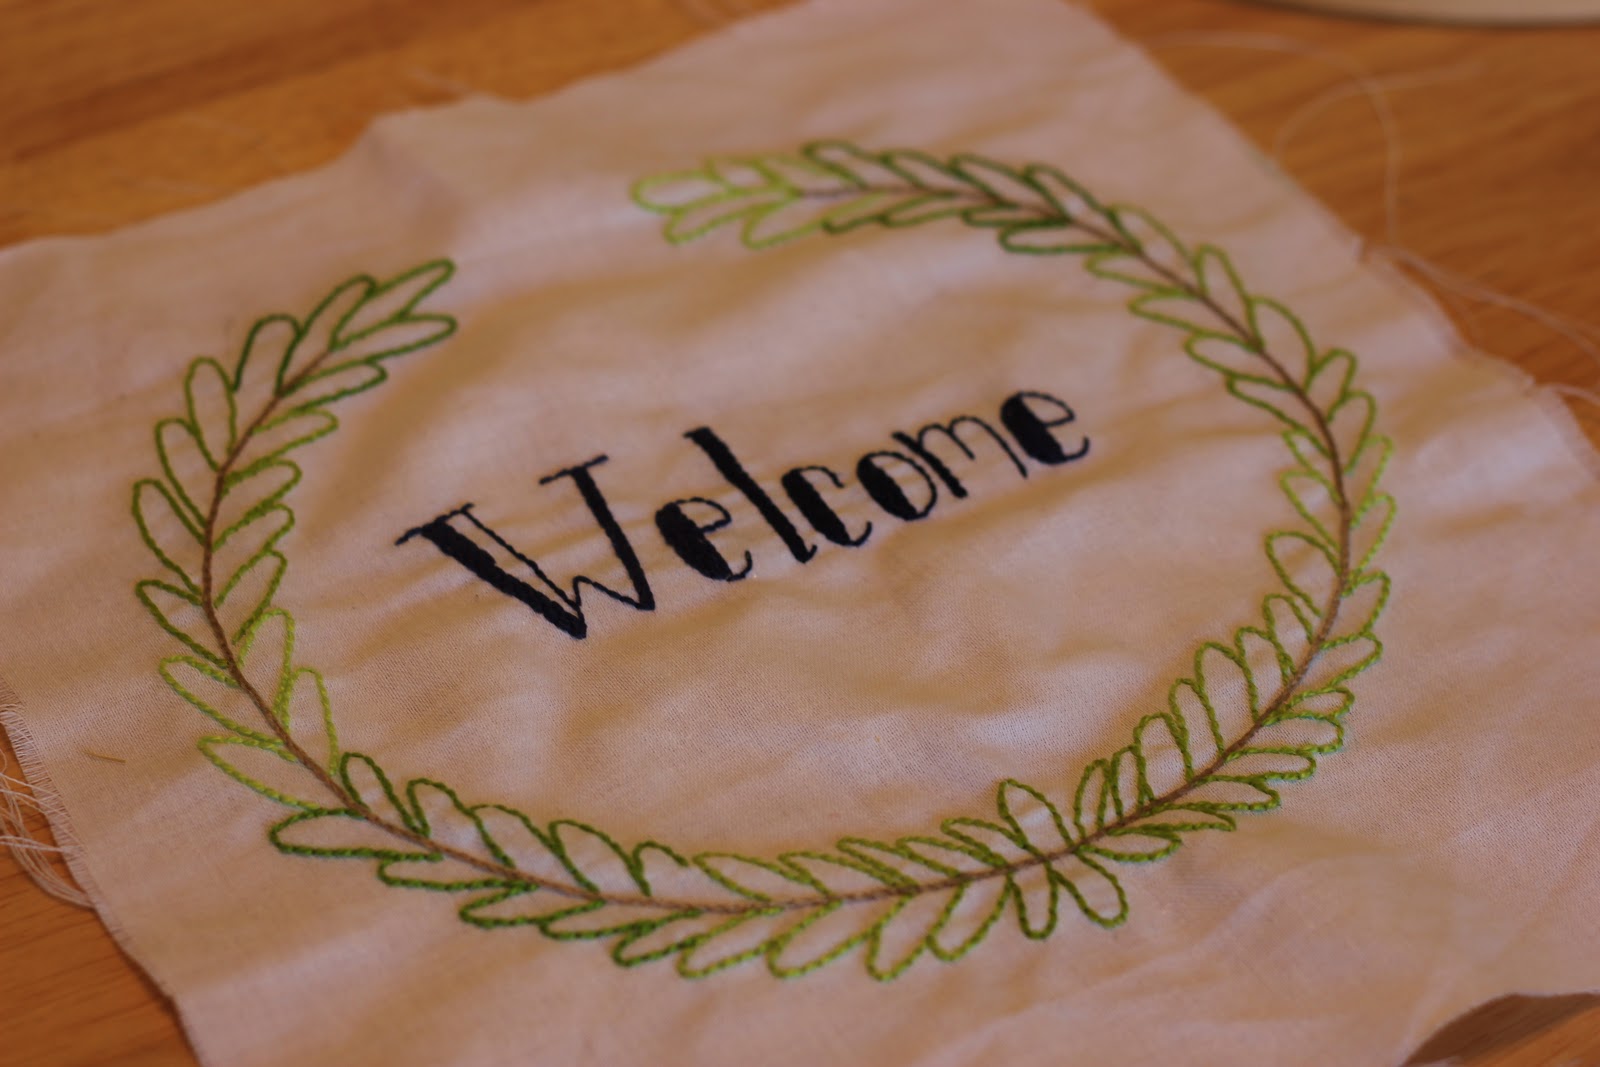
I made a set of embroidery patterns for the etsy store, and here I am, stitching away at finishing my samples so you can see how they all turn out.


There will be a little more than just these three, but why not start with some words to live by? No matter your background, these three terms--together or taken separately--bolster the spirit.


Almost done.


I'm pretty happy with my color pallet here. 

In addition to these, I actually (almost) finished a Tova! I got a 60% teacher appreciation coupon from Joann's and made the trek to my not-so-local store. When I got there, Starbucks in hand, I headed straight for the flannel. Ok, maybe I wandered through the quilting section on my way to the flannel, but I knew what I wanted before I got there, which is an improvement! I decided to go for a nice olive colored solid. I did see the dinosaur flannel, but I decided a dinosaur knit is really what I'm after for my Michele Pfiefer dinosaur tshirt dreams

I say almost finished because even though I wore it today, my collar is still not perfect. I was pretty determined to wear it to school anyway so I threw on a scarf and attempted to make the pairing seem intentional. I wanted to rip that scarf off all day so I could so off the cute yoke and the placket and the gathers, but alas! The collar. I couldn't make myself do it.

Once that's fixed, get ready for the fashion show. I hope to have it all adjusted soon. After all, after tomorrow at 3:10 I'm on Thanksgiving break!

Sunday, November 4, 2012

A Working Weekend

My goal at the moment is to hold two jobs at once.

I have spent the whole of the last three weekends putting together embroidery patterns which will go up in my etsy store by the end of the week. I feel that with these, in addition to my adorable pin cushions, I can start to see some additional income that will make the craft room and all the puttering around justified. I am always so relieved to see something completed, some beautiful, something practically useful that I made. I can work with my hands. I am more than a brain, I am a body as well. (Because all my wild gestures while teaching never convinces me of that fact.)

There is a unique fulfillment in seeing these patterns come to fruition, but I'm not going to lie to you. I'm not just doing this for the warm fuzzies. I have a monkey on my back. His name is grad school loan, and sometimes I like to recite this little speech to him:

*modified from Taken, and please feel free to read in Liam Neeson's voice*

"... If you are looking for ransom, I can tell you I don't have money [right now]. But what I do have are a very particular set of skills; [sewing] skills I have acquired over a very long career. Skills that make me a nightmare for people [loans] like you.... I will look [pinch pennies] for you, I will find [reduce] you, and I will kill you."

Oh but isn't it the great irony of my life and yours that the loans that we took out for things like grad school are not payable by the jobs that we got with them? Therefore, I add a little more onto my workload (though it is fun work) and I do so with the complete and humbling honesty of trying to meet a financial goal before it becomes too much of a financial burden. 


It is incredibly helpful that the second job is wrapped up in a second dream. In the Spring time I am going to be in a craft booth with family all around me, and so, I cut my scouting for new projects short. The question of what to do next is answered in another: what do I want to have in my crafty booth?


I have three of these already pieced into quilt tops, and much more material where these things came from. These precious little vintage sheet quilts are my big item for the booth, and I think their colors will be perfect for the Spring. For now, I will huddle in my house with my crafts, advertise my embroidery patterns, and  enjoy this amazing fireplace with my husband.


We dream big and we start small, and eventually we will get there.


To kick off the weekend, Mr. Kopf and I chaperoned a high school dance. The theme: any time period ever. Here's a peek of my homemade costume. Details and instructions for your own Bible times outfit coming soon!